If you've already experimented with flat moulds, you're probably ready to take things further. A 3D mould opens up a whole world of creative possibilities—from sculptures and jewellery to detailed resin décor.
🎯 What Is a 3D Mould and Why Try It?
A 3D mould reproduces the entire object in volume, not just one surface. It’s ideal for capturing reliefs, depth, and complex shapes.
Compared to flat moulds, a 3D mould allows:
-
More professional results
-
More control over colour and finish
-
Longer-lasting resin pieces
🧪 Materials You’ll Need
-
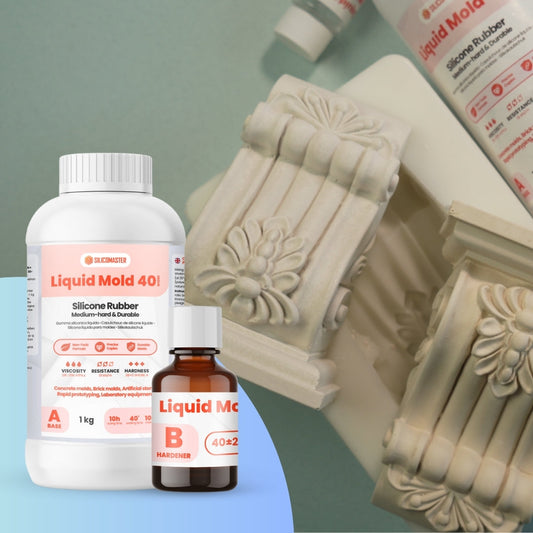
Two-part liquid silicone (RTV type)
-
A solid object to reproduce
-
A container to use as a mould box (plastic or cardboard)
-
Vaseline or release spray
-
Protective gloves, spatula, mixing tools
-
Precision knife or scalpel

Pure Mold 10 - Silicone for Crafting and Fine Details

Liquid Mold 20 - Universal Silicone for Crafting and Sculptures

Liquid Mold 30 - Silicone per Stampi Resilienti e Materiali Pesanti
Which Shore Hardness to Choose
We recommend silicone with Shore hardness 10–30.
For delicate details, go for a softer option (10–20): it's more flexible and easier to demould without damaging the figure.
🛠️ Detailed Process
1. Model and Box Preparation
Ensure the model is clean and dry, place it in the container (mould box), and apply a release agent.
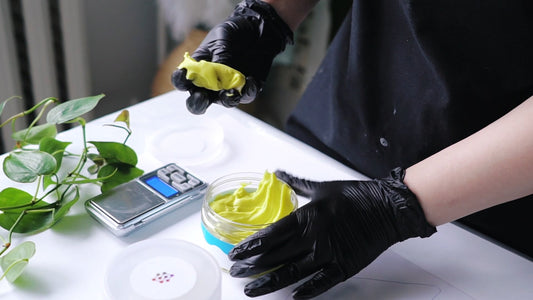
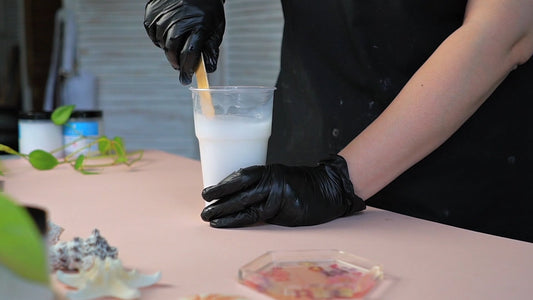
2. Silicone Mixing
Mix slowly according to the specified ratios.
⚠️ Avoid incorporating air bubbles.
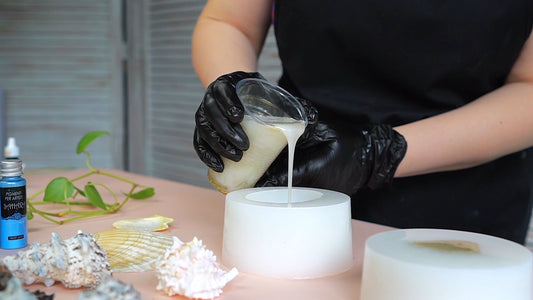
3. Pouring and Curing
Pour from a single point, about 20 cm high, to allow bubbles to rise.
Let it cure undisturbed for 6 to 24 hours depending on temperature and product type.
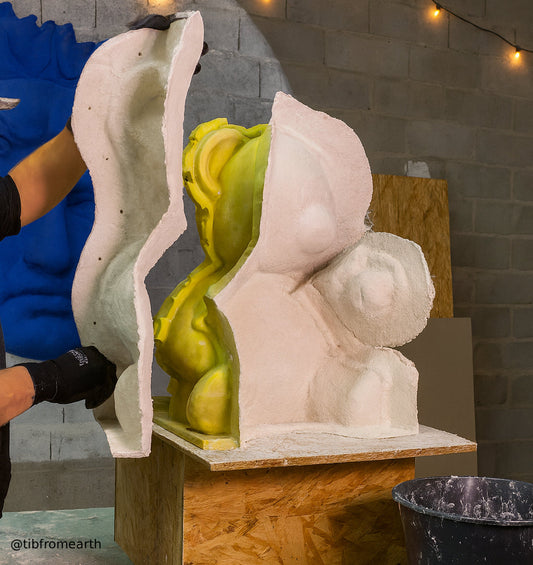
4. Final Demoulding
Once fully cured, remove the model gently.
If needed, make a precise incision in the mould for easy access.
📘 Two-Part “Book” Mould Technique
-
Shape half of the mould with modelling clay
-
Pour the first half of silicone, let it cure
-
Remove the clay, apply release agent, and pour the second half
-
Add registration keys (bumps) to help the mould align perfectly
🏠 Can This Be Done at Home Without a Lab?
Absolutely. Just follow this guide and use basic tools—amazing results are achievable right from your workspace.
✅ In Summary
-
Use two-part liquid silicone
-
Choose appropriate Shore hardness
-
Mix and pour carefully to avoid air bubbles
-
Let it cure properly, and demould with care
-
Use a two-part mould for complex shapes
🎯 Final Thought
You don’t need a lab or years of experience. With the right mindset and materials, this guide will help you turn ideas into unique 3D creations.
🧤 Ready to start? Go for it!
Tags:
Previous
When to Use Paste Silicone? Your Best Ally for Fast, Flat and Textured Moulds
Next
How to Avoid Air Bubbles and Overflow When Pouring Liquid Silicone: Technique and Precision